How to connect a cloud service
ScanTicket allows you to automatically backup your receipts and invoices to your preferred cloud service: Dropbox, Google Drive, or iCloud. Here's how to set up this feature.
Available cloud services
ScanTicket supports three cloud storage services:
- Dropbox: Simple and fast synchronization
- Google Drive: Integration with the Google ecosystem
- iCloud: Ideal for Apple users
Steps to connect a cloud service
Step 1: Access your account
From the main screen of the app, tap the profile icon or go to "My Account".
Step 2: Find the Cloud Services section
Scroll down to the "Cloud Services" section. You will see a list of available services with a "Connect" button next to each one.
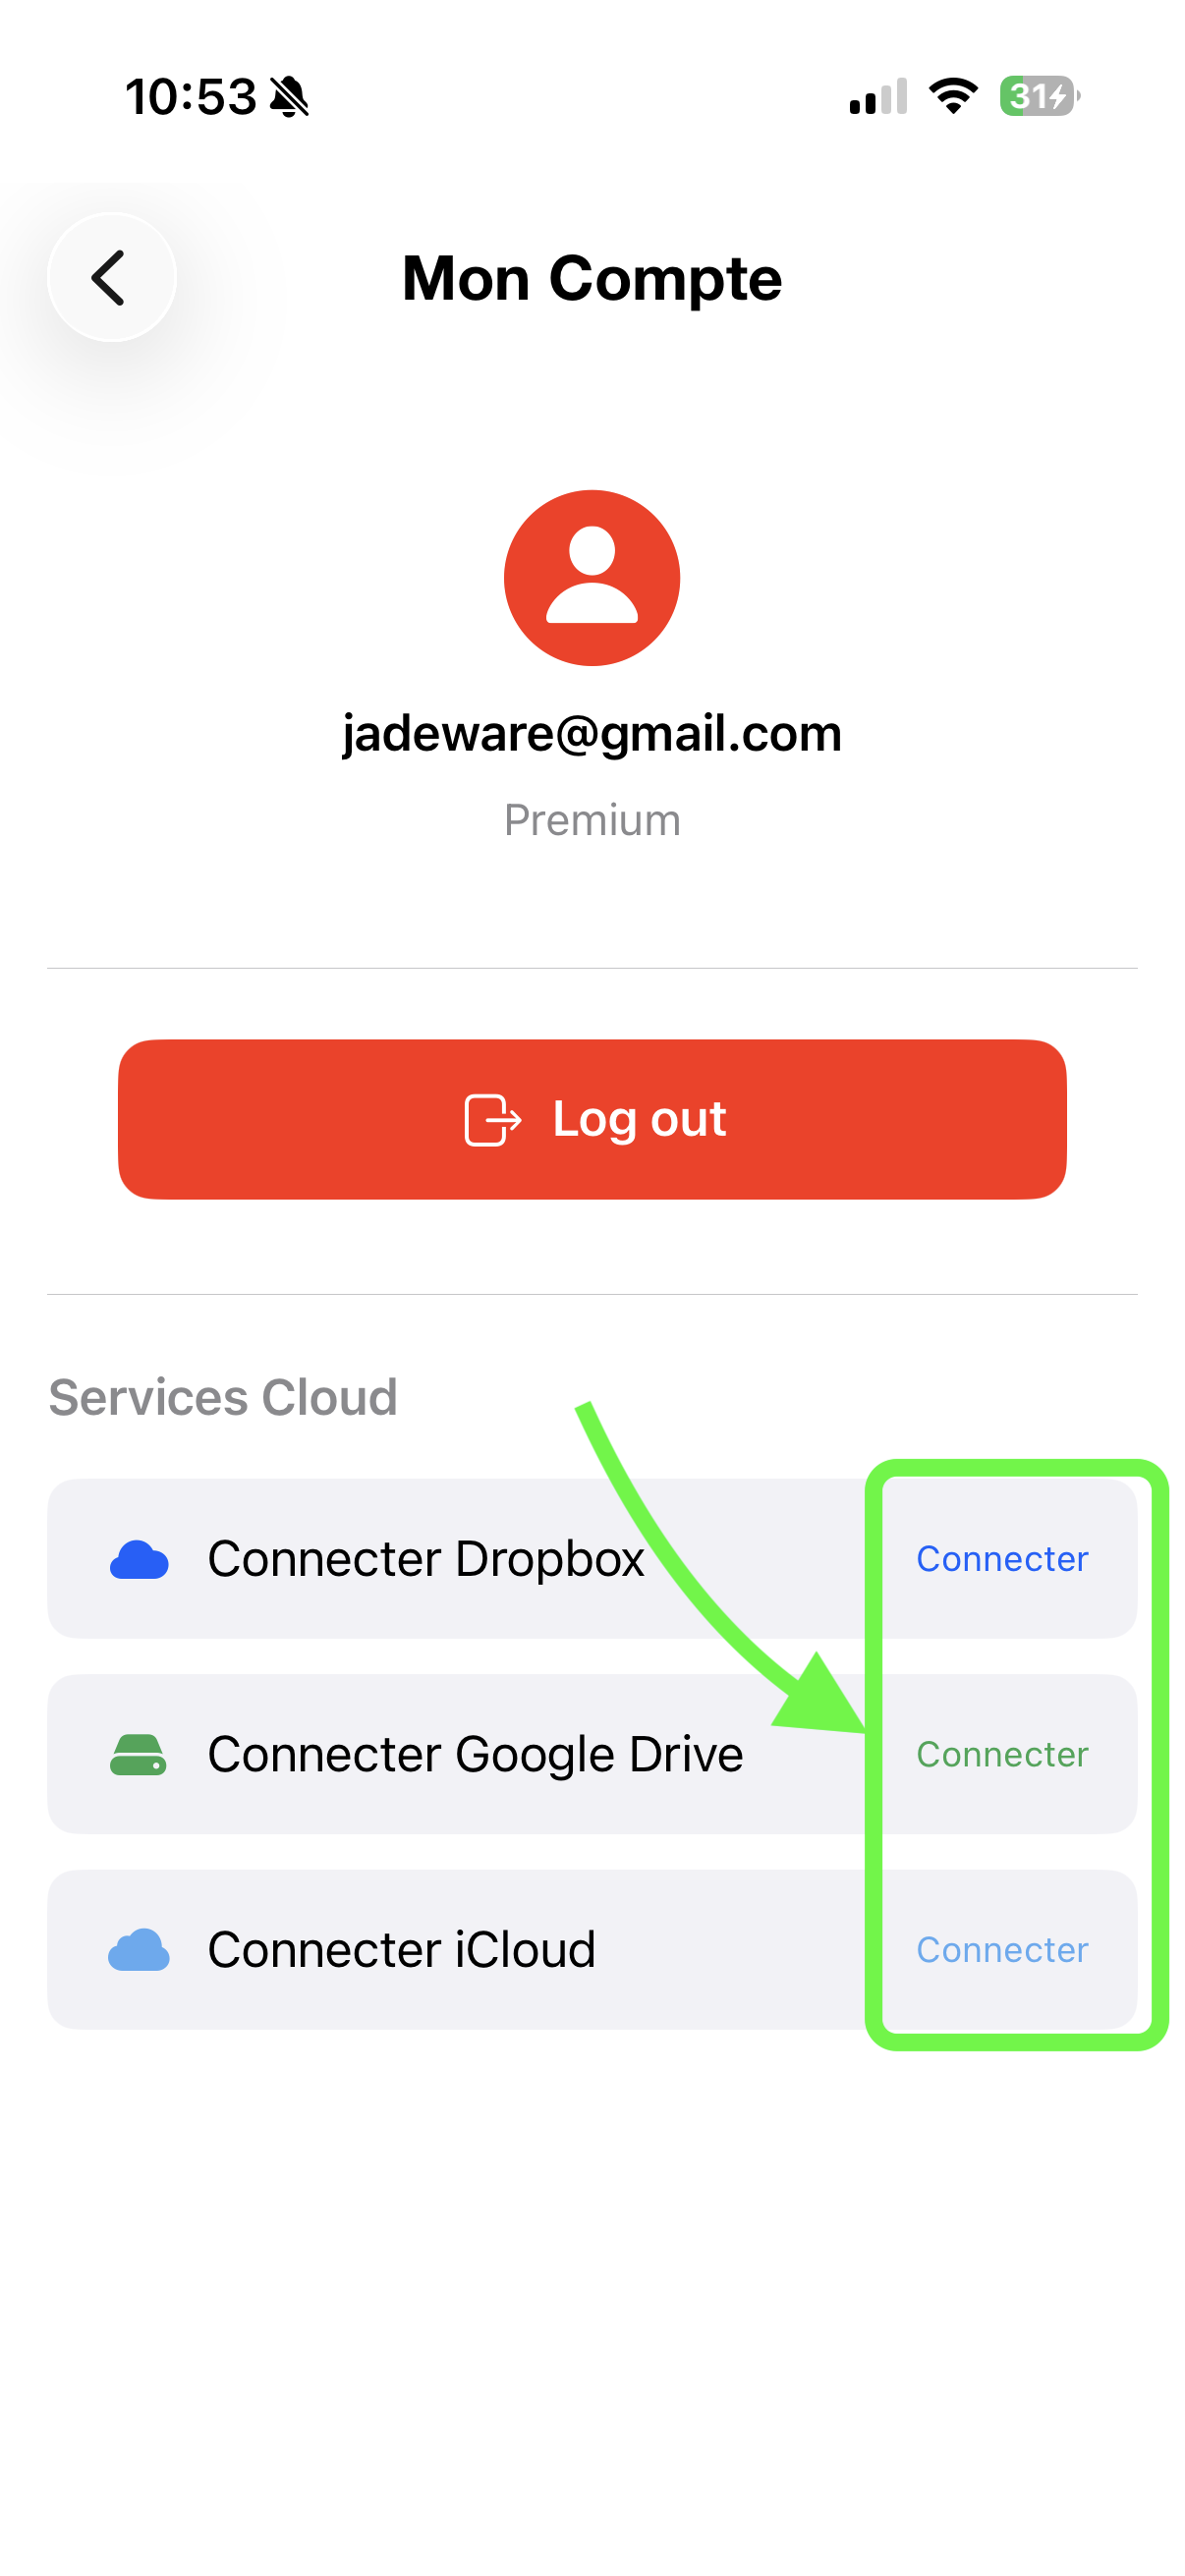
Step 3: Connect your service
Tap the "Connect" button next to your preferred service. You will be redirected to the login page of the selected service.
Step 4: Authorize access
Log in to your cloud account (Dropbox, Google, or iCloud) and authorize ScanTicket to access your storage space. The app will only be able to access the automatically created ScanTicket folder.
Step 5: You're all set!
Once connected, your receipts will be automatically synced with your cloud service. The button will display "Connected" to confirm that the link is active.
Benefits of cloud backup
- Automatic backup: Your receipts are backed up automatically after each scan
- Multi-device access: Access your documents on all your devices
- Security: Your data is protected even if you lose your phone
- Easy sharing: Easily share your documents with your accountant via the cloud folder
Disconnect a service
To disconnect a cloud service, go back to the "Cloud Services" section of your account and tap the corresponding button. Files already synced will remain in your cloud storage.